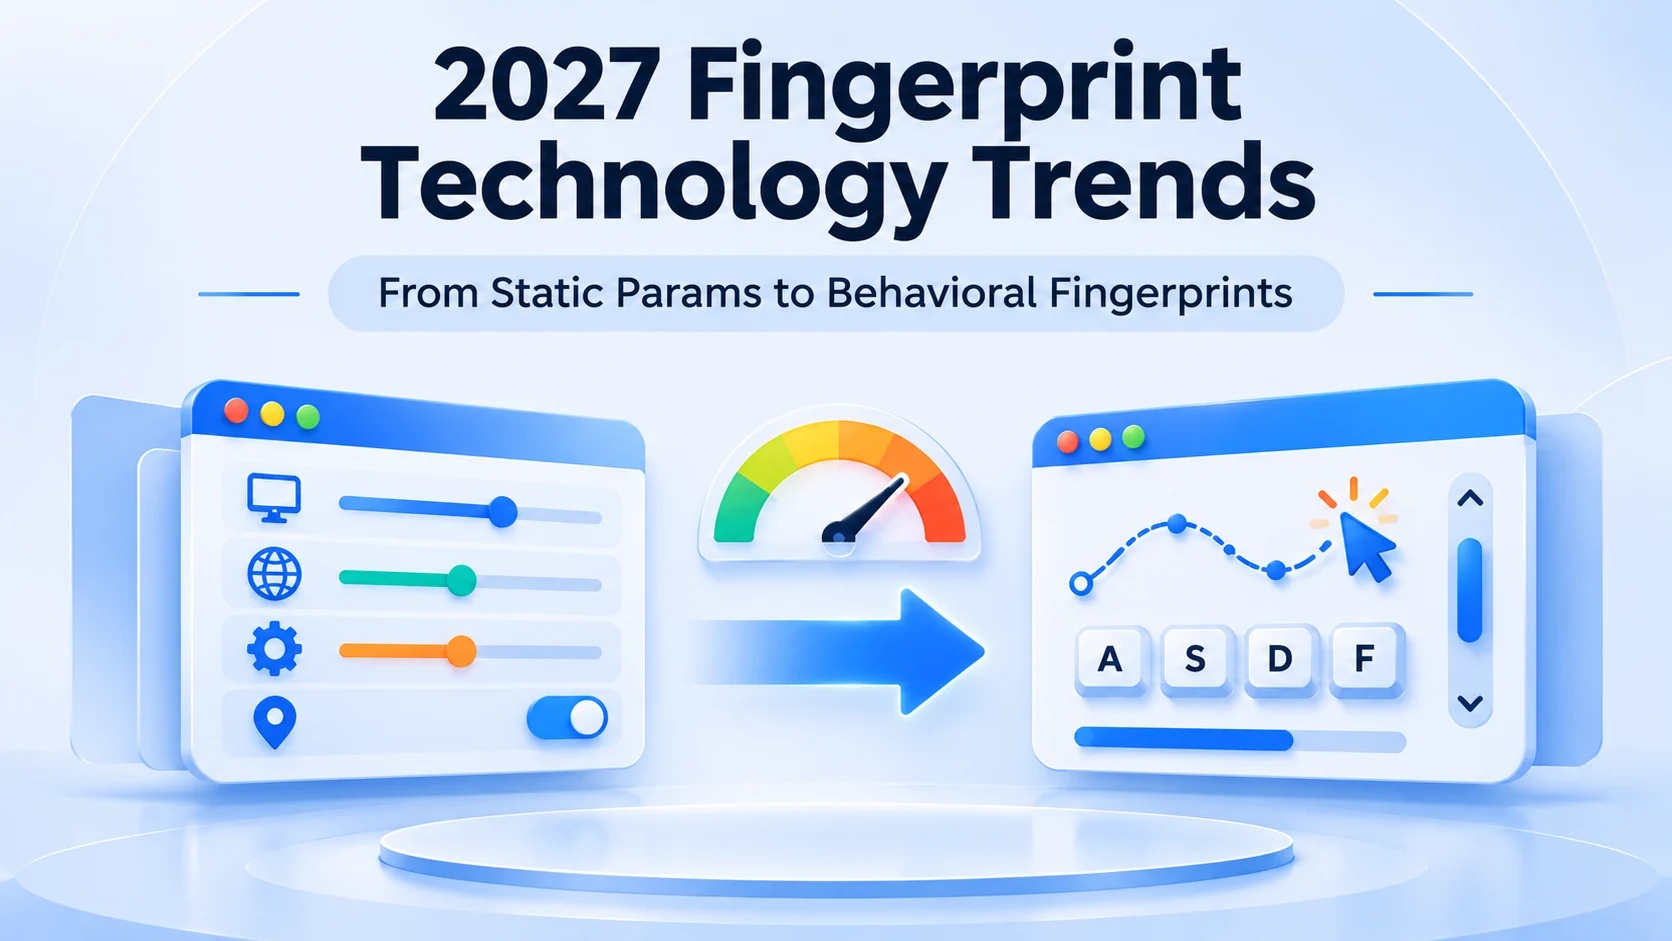
How to Get Started with MostMate: Four Steps from Setup Preview to Your First Profile
Install the client, open the interface, and most people pause for a second. A column of menus on the left, a New Profile button in the top right, and behind it a full-page form. Where exactly to start with the first profile is less obvious than it looks.
MostMate is an antidetect browser built for multi-account work, and its core job is to give every account a fully isolated browser environment. Profiles share no cookies, cache, local storage, or fingerprint parameters, so each account shows up on the platform side as its own separate device. Whether a tool like this is worth it depends largely on how cleanly your first few profiles are built.
How clean they are, in turn, depends on the order you follow the first time. How a profile splits into four layers, and what each of the four design principles blocks, was covered in earlier posts. This one only deals with doing.
There is a lot to decide for the first profile, but the order is fixed. Below, the creation flow is broken into four steps, each with the spots that usually trip people up, and at the end a checklist you can run through before opening a profile.
Before You Start: What Each of the Four Steps Asks You to Decide
The setup preview on the official site compresses the creation flow into four steps, each asking you to decide one key thing. It is a demo on the website, not the client interface, but the four steps map one to one onto what you do in the client, which makes it a good way to see what comes first and what comes after. The platform names, regions, and statuses on the cards are placeholders, not fixed options in the product, so do not try to match them.
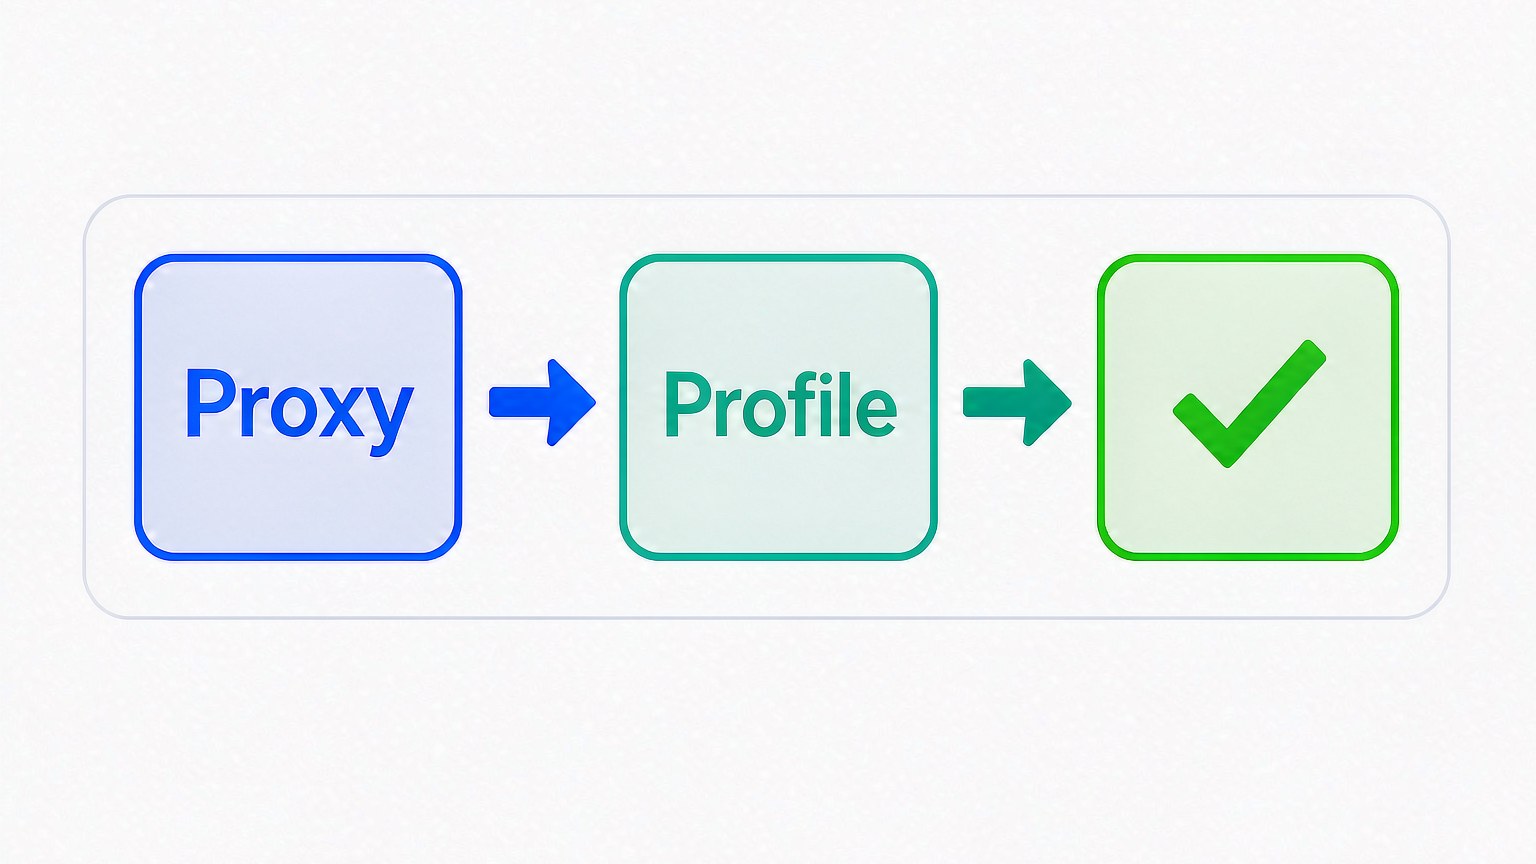
The four steps are pick a platform, connect a proxy, create a secure Profile, and start managing. Profile here means the same thing as an environment in the client; the two words point to the same object.
All four steps have a landing spot in the client. The mapping looks roughly like this:
| Preview step | Where it lives in the client | What to prepare first |
|---|---|---|
| Pick a platform | New Profile basic info: account and group | Which platforms your accounts run on |
| Connect a proxy | Create it in Proxy Management first | Which exit region each account needs |
| Create a secure Profile | Fingerprint settings, check the right panel | Which OS and browser version to use |
| Start managing | Open the profile from the profile list | The account for the first login |
One bit of preparation is worth finishing before you even open the preview. Write down three things:
- Platform: which platform each of these accounts works on. It decides how you name profiles.
- Region: the region each account presents to the outside. It decides where the proxy exits and how timezone and language get set.
- Grouping: by platform or by client. It decides how much time you spend finding profiles later.
The easiest trap is treating the preview as a demo, clicking through it once, and assuming you got it. The real sticking point is the form that comes after. The preview tucks parameters behind a recommended setup, while the client form lays every item out in front of you, and nobody decides the extra dozen fields for you.

Step One: Set Up Proxies First, Not After the Profiles
Proxies are managed on their own in Proxy Management; inside a profile you only ever pick one. Get the order backwards and language, timezone, and location all have to compromise.
Proxy Management is its own menu. The list shows proxy details, notes, exit IP, and creation date, with two buttons at the top for adding and importing proxies. Your lines should take shape in a table like this, not scattered across profile notes.
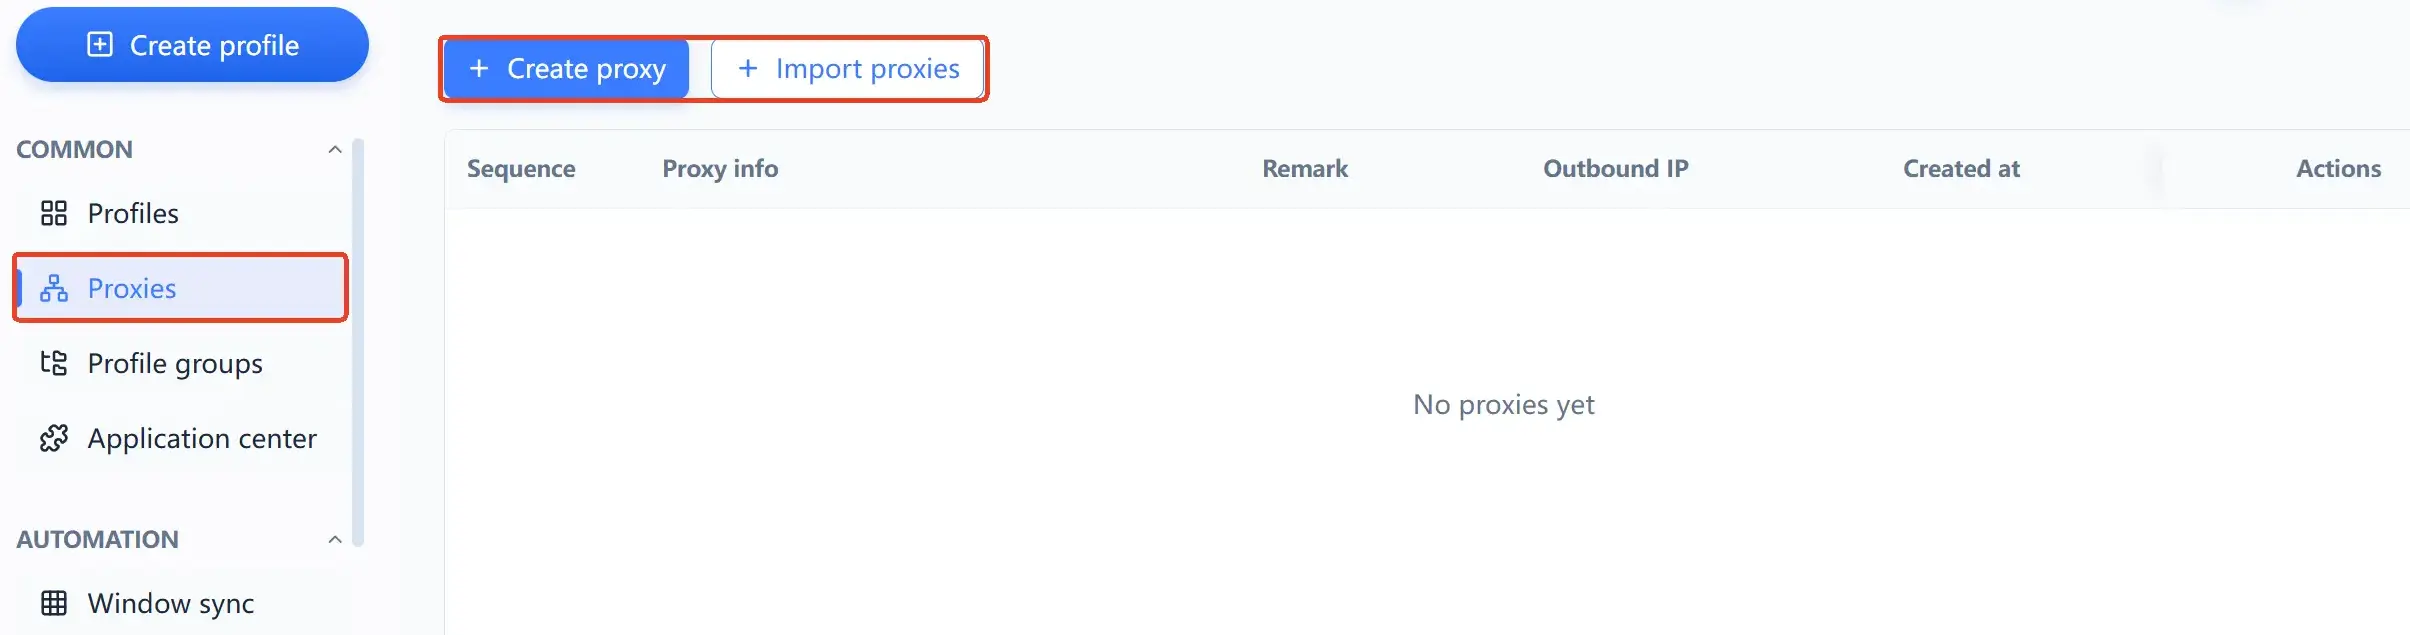
When you create a profile, the proxy setting offers three options: no proxy, custom proxy, and pick a proxy. In the profile list, Proxy and Exit IP each get their own column, side by side with name, linked account, and group.
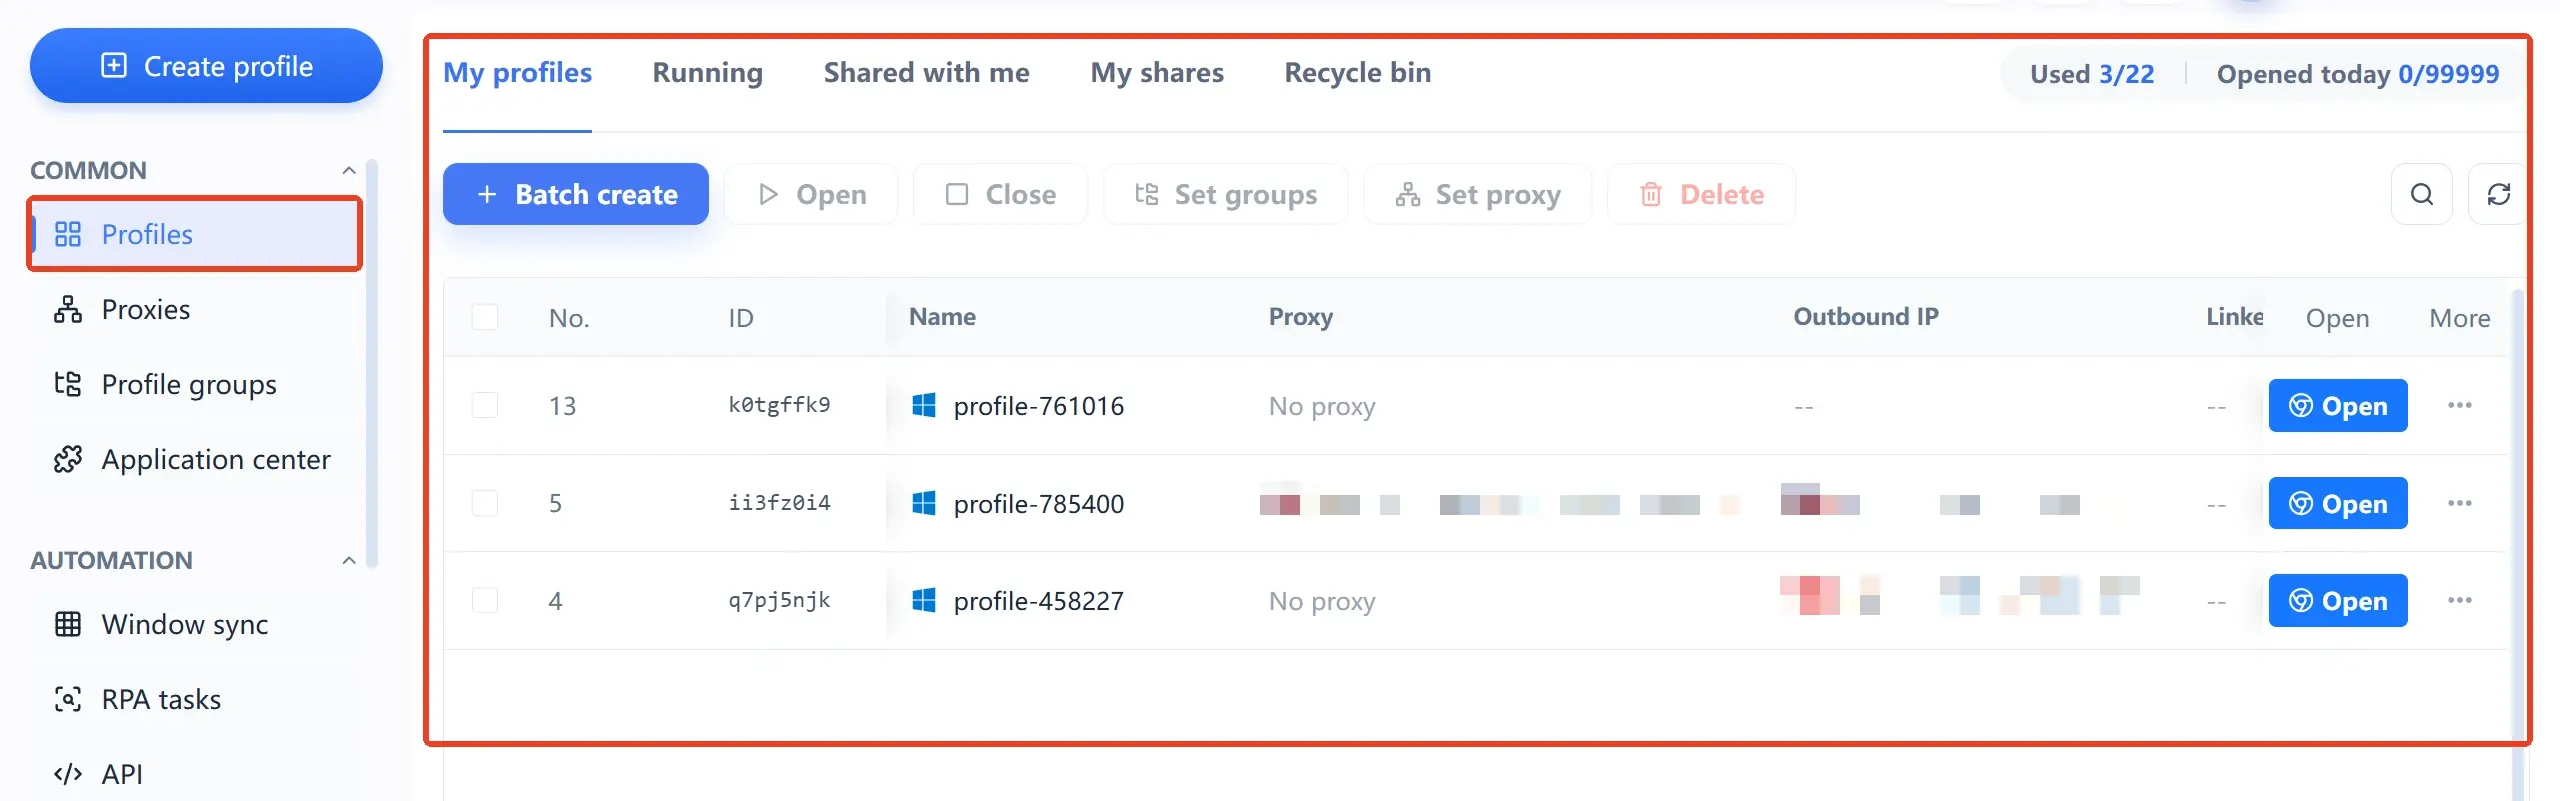
The structure of that table tells you something. The exit is not an afterthought; it is treated as part of the profile itself.
No proxy in hand yet? That does not block you. Create the profile with No proxy, then once a line arrives go back to the profile list, tick the profiles, and assign proxies in one pass with Set Proxy at the top. Create first, fill in later, no rework. Much faster than opening each profile to edit it.
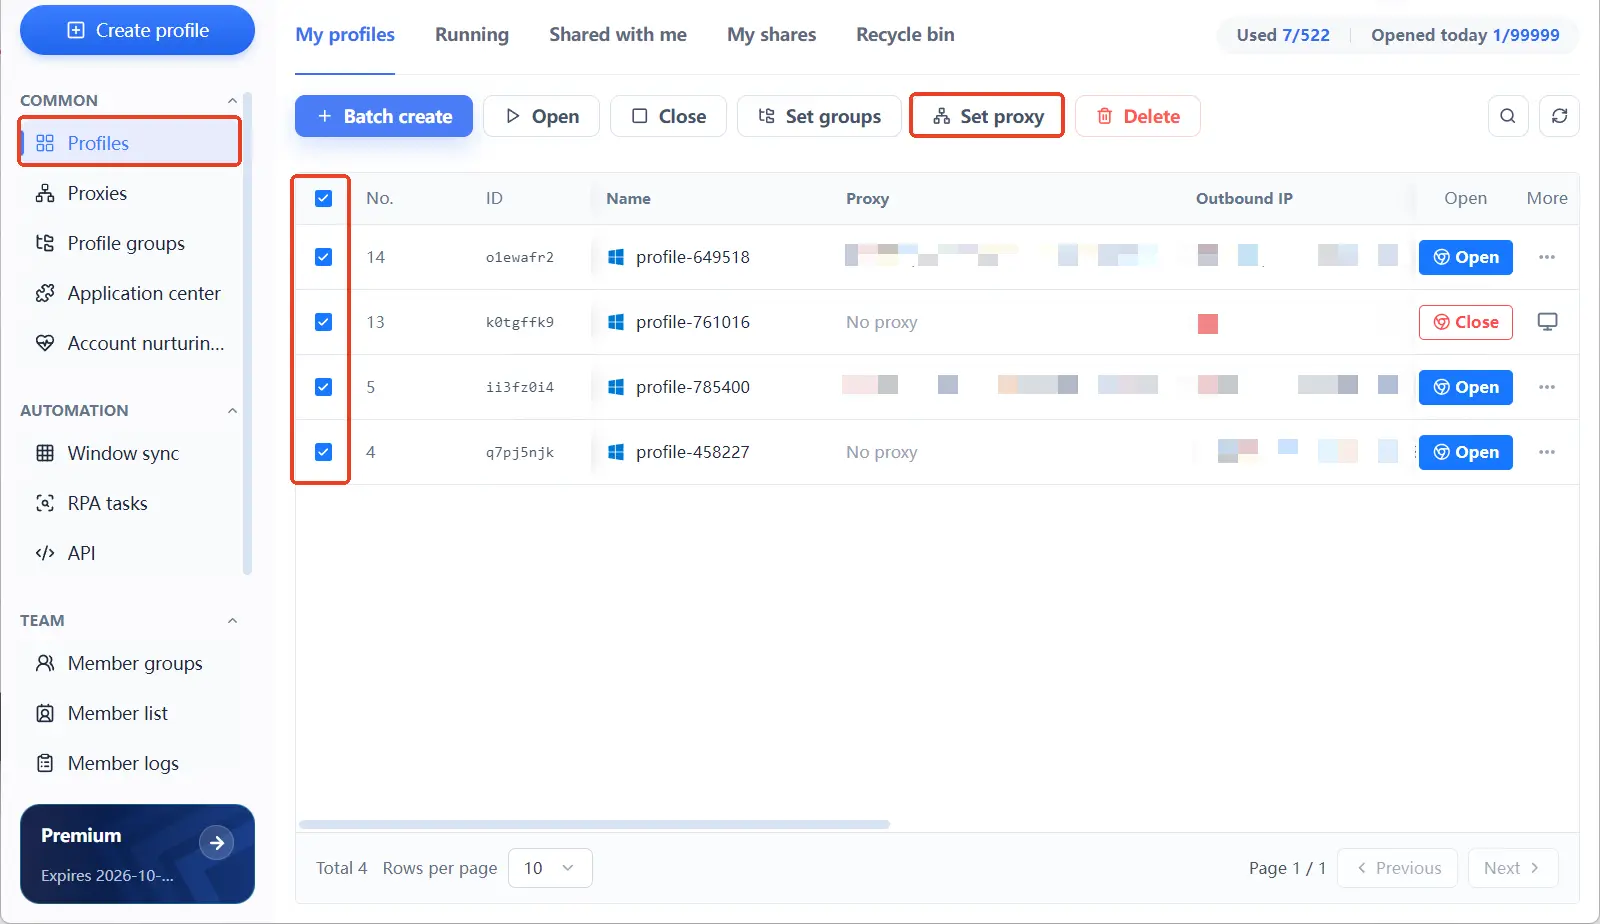
The cost of getting the order backwards hides in the defaults. Language, interface language, timezone, and location all default to Based on IP, which is computed from your exit. Build first and patch the proxy later, and those four get computed from whatever network you were on at the time. After adding the proxy, go back to the preview panel and re-check them.
Step Two: The Create Profile Form and What Each of Its Three Sections Does
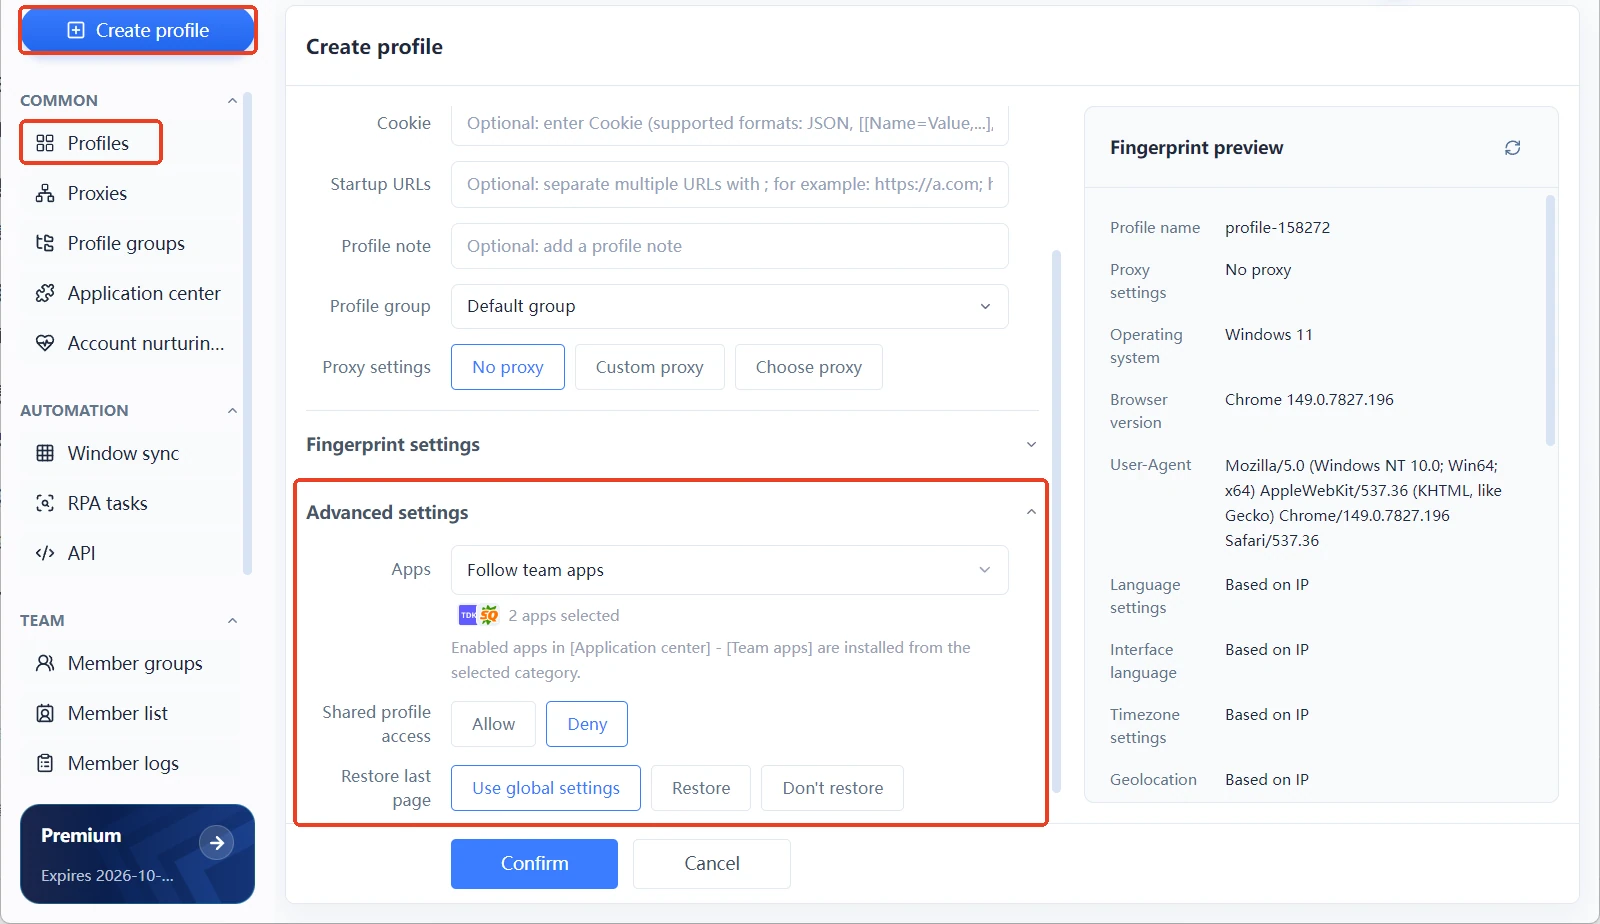
Creating a profile is a form split into three sections: basic info, fingerprint settings, and advanced settings. A fingerprint preview panel stays on the right the whole time. The three sections decide identity and ownership, individual signal values, and extension and sharing rules respectively.
The order is not arbitrary. Basic info answers who this profile represents, fingerprint settings answer what device it looks like from outside, and advanced settings answer how it connects to your team and your apps. Fill top to bottom and you rarely look back.
| Form section | What it decides | When you actually touch it |
|---|---|---|
| Basic info | Name, account, group, notes, cookies, URL | Every time you create a profile |
| Fingerprint settings | OS, browser version, UA and signal values | Only with a clear reference to match |
| Advanced settings | App grouping, sharing, restore last page | With extensions or shared use |
Basic Info: Identity and Ownership
Profile name, linked account, notes, and grouping feel like busywork while you type them. Yet they are the only reason you will still recognize this profile months from now.
Grouping logic matters more than the name. Names are easy to change; grouping logic is not. Decide your grouping rule the first time.
Two fields in the same section are easy to skip. Cookies can be selected or imported, and a start URL makes every session open on the same page.
Go easy on cookies. A cookie carries the login session itself, and importing one from a file of unknown origin hands that account's logged-in state to whoever made the file. Credentials in the wrong hands usually end in account takeover. Cases like these keep appearing in public notices from the Internet Crime Complaint Center.
Fingerprint Settings: The Individual Values
This section first asks for an OS and browser version. Choose one of Windows, macOS, or Linux, the browser version follows, and the UA is generated from those two and can be edited by hand. Most of the remaining dozen-plus items carry a mode selector, so you never type raw values.
Before touching the UA, it helps to know what it is: a string of text the browser declares about itself. Mainstream browsers have spent recent years actively trimming the version details in it, and the official docs now list device detection from the UA as discouraged. In real traffic this string lands on common values anyway; the odder you make it, the more memorable it gets. The MDN page on how browsers declare their UA explains the background well.
Advanced Settings: Extensions and Sharing
None of the three items here exist for single-person use: app grouping, profile sharing access, and restore last page.
App grouping connects to the App Center. Extensions are added and enabled there in one place, then grouped with App Grouping. Pick a grouping in a profile's advanced settings and the interface tells you it will sync to the selected profiles.
What you installed follows the grouping, with no need for anyone to memorize it. The other two are set as needed. Sharing access decides whether teammates can enter this profile; restore last page decides where the next session picks up.
Want the team to see a fixed opening page? Choose restore. Handing the profile to automation? Choose not to restore.
Step Three: Picking Parameters When Defaults Cover Most of It
Language, interface language, timezone, and location default to Based on IP, while resolution, CPU cores, memory, and the font list default to Real. These defaults exist for people who never plan to study fingerprints.
Only two things genuinely need your judgment: which OS and browser version to pick, and whether a few items should move to Custom. Leave the rest alone.
Based on IP means those items are computed from your exit. Wherever the proxy lands, language and timezone lean the same way. That is also why the previous step puts proxies first. Fix the exit and those four line up on their own.
Real means the values are read from your actual machine. Resolution, core count, memory, and fonts taken as-is, paired with a real system identity, describe a machine that genuinely exists.
Here is how the parameter groups map to defaults and the right moment to change them:
| Parameter group | Default | When to change it |
|---|---|---|
| Language, timezone, location | Based on IP | Exit region differs from target market |
| Resolution, cores, memory, fonts | Real, from this machine | Your machine is far from the target device |
| WebRTC, canvas and graphics | Real, Random, or Custom | Only when you have a clear reference |
| OS and browser version | You pick it first | Once per profile, every time |
Random and Custom are for specific cases. Random is not safer. A parameter set that changes every day does not match how a real device behaves over months.
Custom fits when you already have a device in use and need to copy its values exactly. The site puts both approaches side by side in the recommended versus manual setup comparison. One side is eleven fingerprint items still waiting for your decisions; the other is a default set the product chose for you. Neither is right or wrong; the difference is whether you have a reference. Copy by hand if you do, start with defaults if you do not.
Why the defaults are set this way, the post on the four design principles and what each one blocks covers at the engineering level. For daily work, remember one line: settle the proxy and the OS first, keep everything else on default.
Before You Open It: Run the Fingerprint Preview Panel Once
The fingerprint preview panel lists every value you just filled in, in real time, from the profile name all the way down to graphics rendering. Scan it before opening the profile; it beats going back to edit afterwards.
The panel is live. Change anything on the left and the right side follows immediately. Run the check in this order and only open the profile when all seven match:
- The proxy line is not empty: either a proxy is selected, or you know this profile deliberately runs on your local network.
- The OS and browser version are the pair you plan to keep long term, not a random click.
- The UA matches those two choices as one device, with no Windows system wearing Apple-specific graphics values.
- Language, interface language, timezone, and location all agree with the exit region.
- Screen resolution, CPU cores, and device memory do not contradict each other.
- Name, group, and notes let you tell whose account this is at a glance.
- If you use extensions, the app grouping in advanced settings is already selected.
The order of that list matters. The first four decide whether the profile stands up at all; the last three decide whether you will still recognize it later. Get the first four wrong and the profile has to be rebuilt; get the last three wrong and you pay a few extra minutes every day.
Missed items cluster in the middle. Location, resolution, cores, and memory sit between the eye-catching ends, and your eyes slide right past them. They happen to be the part of the device signal that explains the rest.
Finish the check, then click open. Those two minutes save you from editing the profile over and over afterwards. This matters most for profiles where an account is already logged in, because changing identity items breaks the behavior history built up so far.
After Opening: Three Small Things First, Batching Later
Once the first profile is open, do three small things first. Pin the pages you visit most as the starting page, confirm the exit and location match expectations, and set sharing and restore rules to the state you want as default.
Batching can wait. Window sync and RPA come after these three.
One: Pin the Starting Page
The start URL field needs one entry at creation. Every session then opens on the same page, which keeps login state and habits tidy and saves you three manual clicks a day.
Two: Check the Exit and Location
The Exit IP column in the profile list is the fastest place to check. It sits next to the Proxy column, and one glance shows which line this profile is on right now.
If preview and Exit IP agree, the proxy is doing its job.
Three: Set Sharing and Restore Rules
Both switches live in advanced settings and are worth thinking through on first creation. Working alone, keep sharing access off. When a teammate takes over, turn it on and set up member groups and authorized profile groups.
Restore last page works the same way. Picking up where you left off? Choose restore. Handing the profile to RPA? Choose not to, so the page state left by the last task does not leak into the next.
With those three done, the first profile is standing. Scale up once profiles multiply. Window sync can mirror clicks and typing across windows, RPA tasks can run fixed flows per platform, and account nurturing turns daily routines into a dated list.
How to use the account health and nurturing dashboards is covered in the post about keeping pace after setup.
To walk the flow once before deciding, download MostMate. Start from the first profile, follow the four steps above, and come back to this checklist wherever you get stuck.
For a fuller picture of how a profile is organized underneath, the What Is MostMate page lays it out more systematically.
Frequently Asked Questions
No proxy yet. Can I create the profile anyway?
Yes. The proxy setting includes a No proxy option, and creating now does not block editing later. Once a line is ready, go back to the profile list, tick the profiles, and assign proxies with Set Proxy at the top.
Can I change parameters after the profile is created?
Yes, editing uses the same form. But once an account is logged in, changing identity items like OS, browser version, or the exit amounts to showing up as a different device, and the behavior history no longer lines up. Set what you can in one pass and leave it.
Why do language and timezone fill themselves in?
Their default mode is Based on IP, computed from the exit. Where the proxy lands is where they lean. Set the proxy first and you skip a step; patch it afterwards and these items need re-checking.
Should the system be Windows or macOS?
All three options work, and the choice depends on what device you want this profile to look like. If you are mainly managing web dashboards, pick what you use daily and stay consistent with it; that beats picking a system you barely know.
Can the free plan carry this whole flow?
The free plan is $0 and includes 2 browser profiles and 2 members, which is enough to run the four steps and build one or two profiles to verify the flow. Scale up later against the pricing page; in-product pricing is what counts.
The first profile is done. What comes next?
Let it run under real use for a few days: log in, scroll, post, all at your usual rhythm, and watch how the exit and timezone actually behave. Once nothing looks off, build the second profile with the same values, then hand repetitive work to window sync or RPA tasks.

MOSTMATE
Secure Multi-Account Management, Made Simple
Start with your first account and use MostMate to build safer, smarter, and more efficient multi-account operations.
- Independent profiles. Consistent identities.
- AI Automation · Account Health · Team Operations